A medical emergency in the wilderness can transform an enjoyable hike into a life-threatening situation within minutes. Every hiker should carry a properly stocked first aid kit and possess the knowledge to treat common injuries such as cuts, sprains, hypothermia, and allergic reactions until professional help arrives. Unlike urban environments where emergency services respond quickly, remote trails require hikers to become their own first responders.
The difference between wilderness first aid and standard first aid lies in the extended response times and limited resources available on remote trails. Hikers must understand how to stabilise injuries for potentially hours or days whilst awaiting rescue. This knowledge becomes particularly crucial when mobile phone coverage fails and the nearest hospital sits miles away.
Proper preparation involves selecting the right medical supplies, organising them efficiently, and developing practical skills to handle emergencies. Understanding how to prevent common wilderness injuries through proper hygiene, hydration, and trail awareness can mean the difference between a memorable adventure and a dangerous ordeal.
Understanding First Aid in the Wilderness
Wilderness first aid requires different skills and approaches than urban medical care, as hikers face unique risks without immediate access to professional medical services. Proper preparation and risk assessment become critical factors for safe outdoor adventures.
Importance of First Aid for Hikers
Medical emergencies in remote locations can quickly become life-threatening without proper intervention. Emergency services may take hours to reach injured hikers, particularly in mountainous terrain or dense forests.
Common wilderness injuries include:
- Sprains and fractures from falls
- Hypothermia and heat exhaustion
- Cuts and puncture wounds
- Dehydration and altitude sickness
Basic first aid knowledge enables hikers to stabilise injuries until professional help arrives. Simple interventions like wound cleaning, splinting, and temperature regulation can prevent minor injuries from becoming serious complications.
Groups often rely on each other for medical assistance. A single trained person can make the difference between a manageable situation and a potential tragedy.
Differences Between Urban and Wilderness First Aid
Urban first aid assumes rapid access to ambulances, hospitals, and advanced medical equipment. Wilderness first aid focuses on long-term care with limited resources over extended periods.
Key differences include:
| Urban First Aid | Wilderness First Aid |
|---|---|
| Immediate transport available | May require hours for evacuation |
| Professional help within minutes | Self-reliant care for extended periods |
| Extensive medical supplies accessible | Limited to carried equipment |
| Stable environment | Weather and terrain complications |
Wilderness practitioners must improvise with available materials. They need skills in wound management, splinting with natural materials, and recognising when evacuation becomes necessary.
The focus shifts from rapid stabilisation to sustained care. Hikers must monitor patients for hours while maintaining their own safety in challenging conditions.
Assessing Risks Before Hiking
Pre-trip planning identifies potential medical scenarios and required supplies. Different environments present distinct hazards that influence first aid preparation.
Mountain hiking risks:
- Altitude sickness above 2,400 metres
- Rockfall and steep terrain injuries
- Rapid weather changes causing hypothermia
Desert hiking concerns:
- Heat stroke and severe dehydration
- Venomous snake and spider bites
- Limited water sources
Weather forecasts indicate temperature extremes and storm potential. Trail difficulty ratings help predict injury likelihood based on terrain challenges.
Group medical histories reveal existing conditions requiring special attention. Medications, allergies, and chronic conditions affect emergency treatment decisions.
Distance from roads and mobile coverage determines evacuation complexity. Remote locations require more comprehensive first aid supplies and advanced skills.
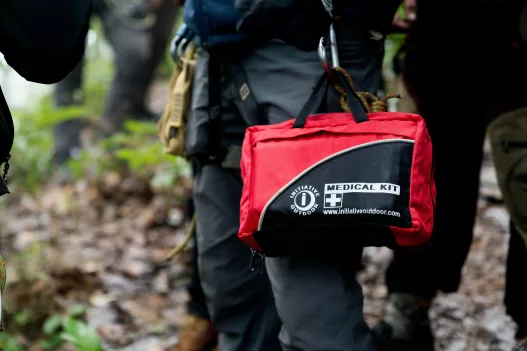
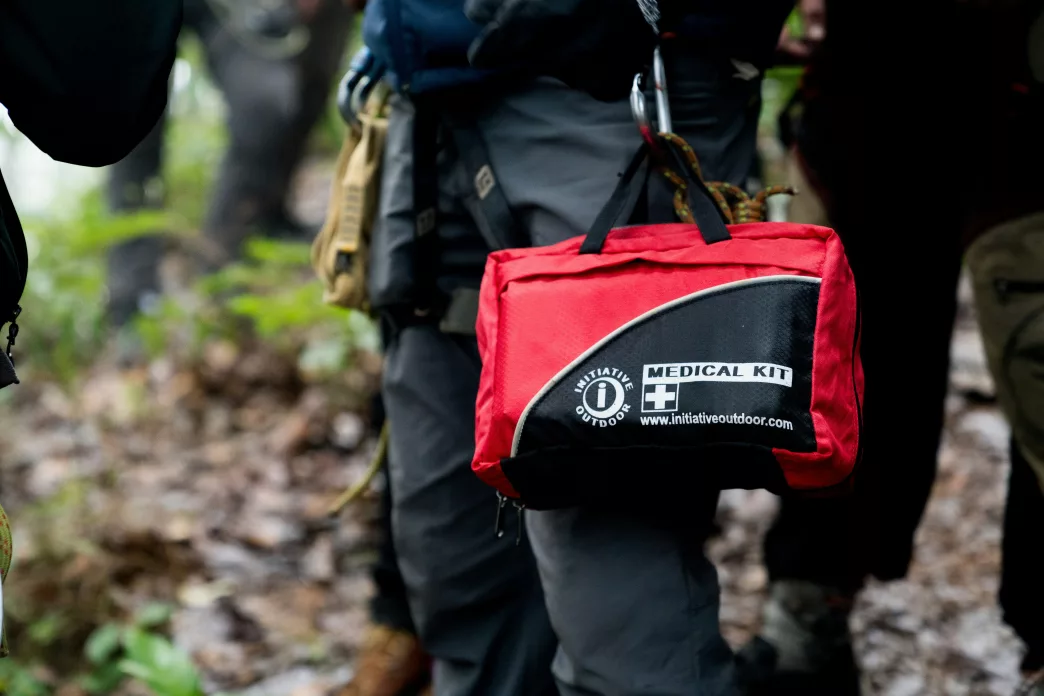
Essential First Aid Kit Contents for Hikers
A well-stocked first aid kit can mean the difference between a minor inconvenience and a serious emergency on the trail. Every hiker should carry specific supplies tailored to wilderness conditions and common outdoor injuries.
Basic Supplies Every Hiker Should Carry
Adhesive bandages form the foundation of any hiking first aid kit. Hikers should pack various sizes, including fabric bandages that stick better when wet and blister-specific plasters.
Gauze pads and medical tape handle larger wounds that standard plasters cannot cover. Non-adherent gauze pads prevent sticking to wounds, whilst medical tape secures dressings effectively.
Elastic bandages provide support for sprains and strains. A 7.5cm elastic bandage works well for ankles and wrists, common injury sites during hiking.
Antiseptic wipes clean wounds when soap and water aren’t available. Individual packets stay sterile longer than bulk containers.
Disposable gloves protect both the injured person and the person providing care. Nitrile gloves work better than latex for people with allergies.
Scissors and tweezers handle various tasks from cutting tape to removing splinters. Sharp, pointed tweezers remove thorns and debris more effectively than blunt ones.
Items for Treating Bleeding and Wounds
Sterile gauze pads in multiple sizes treat different wound types. 5cm x 5cm pads work for small cuts, whilst 10cm x 10cm pads cover larger injuries.
Pressure bandages control serious bleeding through direct pressure. Israeli bandages combine gauze, pressure bar, and securing wrap in one device.
Haemostatic agents stop bleeding faster than pressure alone. Celox and QuikClot gauze contain clotting agents that work even when someone takes blood thinners.
Butterfly closures hold wound edges together when stitches aren’t possible. These adhesive strips work well for clean, straight cuts up to 2.5cm long.
Wound irrigation syringe flushes debris from cuts and scrapes. A 20ml syringe with 18-gauge catheter tip provides adequate pressure for cleaning.
Burn gel provides immediate relief for minor burns from camp stoves or hot equipment. Water-based gels cool burns without trapping heat.
Medications and Topical Treatments
Ibuprofen reduces inflammation from sprains, strains, and general pain. 400mg tablets work for most adults, taken every 6-8 hours as needed.
Paracetamol treats pain and fever without stomach irritation. It works differently from ibuprofen, so hikers can take both medications together safely.
Antihistamines combat allergic reactions to plants, insects, or food. Loratadine provides 24-hour relief without drowsiness, whilst cetirizine works faster.
Hydrocortisone cream reduces itching and inflammation from insect bites, poison ivy, and minor skin irritations. 1% strength provides effective relief for most conditions.
Antiseptic cream prevents infection in minor cuts and scrapes. Bacitracin or triple antibiotic ointment works well for most people.
Electrolyte packets replace minerals lost through sweating, vomiting, or diarrhoea. Powder packets weigh less than tablets and dissolve faster.
Tools and Emergency Gear
Thermometer helps assess fever and hypothermia. Digital thermometers provide quick, accurate readings in wilderness conditions.
Emergency whistle signals for help when voice alone isn’t enough. Three sharp blasts indicate distress in most rescue protocols.
Emergency blanket prevents hypothermia and shock. Mylar blankets reflect body heat whilst weighing only 60 grams.
Duct tape repairs gear and creates splints for fractures. Wrap small amounts around trekking poles rather than carrying entire rolls.
Safety pins secure bandages and slings when tape won’t stick. Assorted sizes handle different tasks from clothing repairs to makeshift splints.
Headlamp provides hands-free lighting for nighttime emergencies. LED models last longer than incandescent bulbs and work better in cold conditions.
Permanent marker writes medical information on tape or skin. Waterproof markers work better than standard pens in wet conditions.
Wilderness First Aid Skills Every Hiker Needs
Hikers must master specific medical skills to handle emergencies when professional help is hours away. These skills include proper patient assessment, bone and joint injury management, temperature-related illness treatment, and reaction management for bites and stings.
Performing Initial Assessment and Triage
The primary assessment follows the ABCDE method: Airway, Breathing, Circulation, Disability, and Exposure. This systematic approach helps identify life-threatening conditions first.
Check the airway by looking for obstructions and listening for unusual sounds. If the person is unconscious, perform a jaw thrust to open the airway whilst protecting the neck.
Assess breathing by watching chest movement and feeling for air flow. Normal breathing rates range from 12-20 breaths per minute for adults.
Evaluate circulation by checking pulse strength and rate at the wrist or neck. Look for signs of bleeding and check skin colour for circulation problems.
Disability assessment involves checking neurological function. Ask the person to move fingers and toes. Check pupils for size and reaction to light.
Exposure means looking for hidden injuries whilst preventing heat loss. Remove clothing carefully to examine for wounds, swelling, or deformity.
Triage priorities in wilderness settings focus on conditions that can be treated with available resources. Life-threatening airway, breathing, and severe bleeding issues take precedence over fractures or minor wounds.
Managing Sprains, Strains, and Broken Bones
Sprains affect ligaments connecting bones, whilst strains involve muscles or tendons. Both require immediate RICE treatment: Rest, Ice, Compression, and Elevation.
Apply cold therapy using snow, cold water, or instant cold packs for 15-20 minutes every 2-3 hours. Never apply ice directly to skin.
Compression with elastic bandages reduces swelling but should not cut off circulation. Check fingers or toes regularly for colour and sensation.
Fracture signs include deformity, severe pain, inability to bear weight, grinding sounds, or bone visible through skin. Open fractures require immediate wound care to prevent infection.
Splinting stabilises fractures and reduces pain during evacuation. Use trekking poles, sleeping mats, or sturdy sticks as splint materials.
Splinting technique involves immobilising joints above and below the fracture. Pad the splint with clothing to prevent pressure sores. Check circulation after splinting.
For suspected spinal injuries, avoid moving the person unless they face immediate danger. Keep the head, neck, and spine aligned during any necessary movement.
Treating Hypothermia and Heat-Related Illness
Hypothermia occurs when core body temperature drops below 35°C. Early signs include shivering, confusion, and loss of coordination.
Mild hypothermia treatment involves removing wet clothing and insulating the person with dry layers. Provide warm, sweet drinks if they are conscious and alert.
Severe hypothermia symptoms include violent shivering that suddenly stops, irrational behaviour, and loss of consciousness. Handle the person gently as rough movement can trigger cardiac arrest.
Rewarm severely hypothermic patients slowly using body heat, warm water bottles, or chemical heat packs applied to the torso. Avoid warming arms and legs first.
Heat exhaustion presents with heavy sweating, weakness, nausea, and headache. Core temperature remains normal but the person feels unwell.
Treatment involves moving to shade, removing excess clothing, and providing cool water to drink. Apply wet cloths to the head and neck.
Heat stroke is life-threatening with core temperature above 40°C. The person may stop sweating, become confused, or lose consciousness.
Aggressive cooling is essential. Use whatever water is available to wet the person completely. Fan them to increase evaporation. Cool until mental status improves.
Handling Bites, Stings, and Allergic Reactions
Insect stings typically cause localised pain, swelling, and redness. Remove visible stingers by scraping with a fingernail or knife edge rather than squeezing.
Apply cold therapy to reduce swelling and pain. Antihistamines help control itching and mild allergic reactions.
Tick removal requires fine-tipped tweezers or dedicated tick removal tools. Grasp the tick close to the skin and pull steadily upward without twisting.
Clean the bite area with antiseptic after removal. Save the tick in a sealed container for later identification if symptoms develop.
Snake bites require immediate medical evacuation. Keep the person calm and still to slow venom circulation. Remove jewellery before swelling begins.
Do not cut the wound, apply ice, or use tourniquets. Mark the edge of swelling with a pen and note the time to track progression.
Anaphylaxis is a severe allergic reaction causing difficulty breathing, swelling, and shock. Symptoms can develop within minutes of exposure.
Administer adrenaline (epinephrine) immediately using an auto-injector if available. Inject into the outer thigh muscle. Call for emergency evacuation whilst monitoring breathing and circulation.
Position the person lying flat unless breathing is difficult. Be prepared to perform CPR if they become unconscious.
How to Pack and Organise Your First Aid Kit
The container choice affects durability and accessibility, whilst proper organisation determines response speed during emergencies. Waterproofing methods protect supplies from moisture, and weight distribution impacts hiking comfort.
Choosing the Right Container
Hard-shell containers provide superior protection for fragile items like glass vials and electronic devices. Pelican cases and similar waterproof boxes resist impact damage and seal completely against moisture.
Soft pouches offer flexibility and conform to pack shapes better than rigid containers. Nylon or canvas bags with multiple compartments allow hikers to distribute weight evenly across their pack.
Container Size Guidelines:
- Day hikes: 150-200ml capacity
- Weekend trips: 300-400ml capacity
- Extended expeditions: 500ml+ capacity
Clear plastic containers enable quick visual inventory checks without opening the kit. Translucent materials help identify contents rapidly during stress situations.
Dual-container systems work well for longer expeditions. Hikers can keep basic supplies in an easily accessible belt pouch whilst storing comprehensive gear in their main pack.
Prioritising Accessibility and Organisation
Immediate Access Items (Top Layer):
- Adhesive bandages
- Antiseptic wipes
- Pain relief tablets
- Instant cold packs
Critical supplies must remain within arm’s reach during emergencies. Items needed for common injuries like cuts and sprains should occupy the most accessible compartments.
Colour-coded pouches simplify organisation under stress. Red pouches can hold wound care supplies, blue for medications, and green for tools like scissors and tweezers.
Labelling systems prevent confusion when visibility is poor. Waterproof labels or permanent markers help identify contents quickly, especially when multiple people might access the kit.
Organisation Layers:
- Top: Frequent-use items
- Middle: Medications and ointments
- Bottom: Bulky items and tools
Elastic bands or velcro straps secure loose items and prevent rattling during movement.
Waterproofing and Weight Considerations
Double-bagging medications protects against moisture damage and contamination. Sealed plastic bags inside the main container provide redundant protection for critical supplies.
Desiccant packets absorb residual moisture that penetrates outer seals. Silica gel sachets prevent medication degradation and keep bandages dry.
Weight-Saving Strategies:
- Remove excess packaging from commercial products
- Repackage liquids into smaller containers
- Choose lightweight alternatives (fabric tape vs. heavy adhesive)
Vacuum-sealed bags compress bulky items like gauze pads and triangular bandages. This method reduces volume by up to 60% without compromising sterility.
Waterproof tape seals container edges and provides emergency repair material. Quality marine tape serves dual purposes whilst adding minimal weight.
Strategic placement affects pack balance and accessibility. Positioning the first aid kit in side pockets or hip belt pouches enables quick access without removing the entire pack.
Responding to Common Wilderness Medical Emergencies
Wilderness emergencies require immediate assessment and proper stabilisation techniques. Fractures need immobilisation with improvised splints, wounds require cleaning and protection from infection, and heat-related illnesses demand rapid cooling and rehydration.
Dealing with Fractures and Dislocations
Never attempt to reset a dislocation in the wilderness. Stabilise the injured limb in the position found and evacuate immediately.
For suspected fractures, immobilise the joint above and below the injury site. Use trekking poles, tent stakes, or sturdy branches as splints. Pad the splint with clothing or foam to prevent pressure sores.
Open fractures require special attention:
- Control bleeding with direct pressure around the wound
- Cover the exposed bone with sterile gauze
- Do not push protruding bones back into the wound
Check circulation below the injury every 15 minutes. Look for blue fingernails or toes, numbness, or absent pulse. Loosen splints if circulation becomes compromised.
Create a sling for arm injuries using a triangular bandage or shirt. The injured arm should rest at a 90-degree angle across the chest.
Treating Cuts, Scrapes, and Minor Burns
Clean wounds immediately with clean water to remove dirt and debris. Apply direct pressure with a clean cloth to control bleeding.
For deep cuts:
- Apply pressure for 10-15 minutes continuously
- Elevate the wound above heart level if possible
- Use pressure points if bleeding persists
Close minor cuts with butterfly bandages or adhesive strips. Pull wound edges together gently before applying the closure.
Burns from camping stoves or hot water need immediate cooling. Flush with cool water for 10-20 minutes. Never use ice or butter on burns.
Cover all wounds with sterile gauze and secure with medical tape. Change dressings daily or when they become wet or soiled.
Addressing Dehydration and Sunstroke
Early dehydration symptoms include:
- Thirst and dry mouth
- Decreased urination
- Fatigue and dizziness
Treat dehydration with small, frequent sips of water. Add electrolyte tablets or a pinch of salt to replace lost minerals.
Sunstroke presents with hot, dry skin, rapid pulse, and altered mental state. Move the patient to shade immediately and begin aggressive cooling.
Cooling techniques:
- Remove excess clothing
- Apply wet cloths to neck, armpits, and groin
- Fan the patient to increase evaporation
- Give cool water if conscious and able to swallow
Monitor core temperature and mental status closely. Sunstroke requires immediate evacuation to medical facilities.
Preventing Illness and Injury on the Trail
Prevention remains the most effective first aid strategy in wilderness environments. Proper hydration, nutrition, navigation planning, and hazard recognition significantly reduce the likelihood of medical emergencies occurring miles from help.
Proper Hydration and Nutrition
Dehydration causes more hiking emergencies than most people realise. Adults require 2-3 litres of water daily during moderate activity, increasing to 4-5 litres in hot conditions or strenuous terrain.
Electrolyte balance becomes critical during extended activity. Plain water alone can lead to hyponatremia when consumed excessively without sodium replacement.
Essential hydration practices:
- Drink 200-300ml every 15-20 minutes during activity
- Monitor urine colour (pale yellow indicates proper hydration)
- Carry water purification tablets or filter systems
- Plan water sources before departure
Energy depletion contributes to poor decision-making and increased accident risk. Hikers should consume 200-300 calories per hour during activity, focusing on easily digestible carbohydrates.
Pack lightweight, nutrient-dense foods like nuts, dried fruit, energy bars, and jerky. Avoid unfamiliar foods that might cause digestive upset.
Safe Navigation and Route Planning
Getting lost creates cascading problems including exposure, dehydration, and panic-driven poor decisions. Proper route planning prevents most navigation emergencies.
Study topographic maps thoroughly before departure. Identify key landmarks, escape routes, and potential hazards along the planned route.
Navigation essentials:
- GPS device with spare batteries
- Compass and current topographic maps
- Written route plan left with trusted contact
- Known turnaround times for weather or delays
Weather conditions change rapidly in wilderness areas. Check forecasts hourly and prepare for conditions two grades worse than predicted.
Inform someone of your exact route, expected return time, and emergency contact procedures. Establish check-in schedules for multi-day trips.
Recognising Environmental Hazards
Environmental awareness prevents most serious wilderness injuries. Terrain assessment, weather monitoring, and wildlife recognition require constant attention.
Rocky terrain hazards:
- Loose scree that shifts underfoot
- Wet rocks creating slip hazards
- Rockfall zones below cliff faces
- Unstable boulder fields
River crossings cause numerous hiking fatalities annually. Fast-moving water above knee-deep becomes extremely dangerous. Swift water just 15cm deep can knock adults off balance.
Weather poses significant threats beyond obvious storms. Hypothermia occurs in temperatures up to 10°C when combined with wind and moisture.
Wildlife encounter prevention:
- Store food in bear-proof containers
- Make noise in areas with limited visibility
- Maintain 25 metres distance from large mammals
- Avoid nesting areas during breeding seasons
Recognise signs of altitude sickness above 2,500 metres including headache, nausea, and fatigue. Immediate descent remains the only reliable treatment for severe symptoms.
Hygiene and Sanitation in the Wild
Proper hygiene practices prevent illness and infection whilst camping or hiking. Clean water sources, personal cleanliness, and responsible waste disposal form the foundation of wilderness health management.
Managing Personal Hygiene Whilst Hiking
Hand hygiene remains the most critical prevention measure against illness. Hikers should wash hands with soap and water before eating, after using the toilet, and after handling potentially contaminated items.
Alcohol-based hand sanitiser provides an effective alternative when water is scarce. Choose products containing at least 60% alcohol concentration for maximum effectiveness.
Body cleaning requires modification in wilderness settings. Biodegradable soap used at least 60 metres from water sources prevents environmental contamination. A small flannel or wet wipes serve for quick cleaning.
Foot care prevents serious complications during extended hikes. Daily sock changes reduce moisture buildup and bacterial growth. Powder helps control dampness in boots.
Clean feet thoroughly each evening, paying attention to areas between toes. Dry feet completely before putting on clean socks.
Handling Waste Responsibly
Human waste must be buried 15-20 centimetres deep and at least 60 metres from water sources, trails, and campsites. Carry a lightweight trowel for proper disposal.
Used toilet paper should be packed out in sealed bags rather than buried. Many areas now require complete waste removal using portable toilet systems.
Food waste attracts wildlife and creates health hazards. Pack out all food scraps, including biodegradable items like fruit peels and eggshells.
Greywater from washing dishes or cleaning should be strained and disposed of 60 metres from water sources. Scatter strained food particles widely or pack them out.
Rubbish disposal follows leave-no-trace principles. Everything brought into the wilderness must be carried out, including bottle caps, sweet wrappers, and cigarette butts.
Purifying Water Sources
Boiling water remains the most reliable purification method. Bring water to a rolling boil for one minute at sea level, or three minutes above 2,000 metres elevation.
Water purification tablets provide portable treatment options. Iodine tablets work effectively against most bacteria and viruses but require 30 minutes contact time.
Chlorine dioxide tablets eliminate cryptosporidium and giardia more effectively than iodine. Follow manufacturer instructions for proper dosing and contact time.
Portable filters remove bacteria, protozoa, and sediment from water sources. Choose filters rated for 0.1 microns or smaller pore size for maximum protection.
UV sterilisation devices kill microorganisms through ultraviolet light exposure. These require clear water and battery power but work quickly on small quantities.
Always treat water from natural sources, even if it appears clean. Mountain streams and lakes can harbour dangerous pathogens invisible to the naked eye.
Frequently Asked Questions
Hikers commonly ask about essential first aid kit contents, weight reduction strategies, and wilderness medical training options. These questions address practical concerns about emergency preparedness and safety protocols for outdoor adventures.
What should be included in a hiking first aid kit?
A hiking first aid kit should contain plasters in various sizes, antiseptic wipes, and sterile gauze pads for wound care. Paracetamol and ibuprofen help manage pain and inflammation.
Medical tape secures bandages whilst elastic bandages support sprains and strains. Tweezers remove splinters and debris from wounds.
Instant cold packs reduce swelling and pain from injuries. Include a small pair of scissors for cutting tape and gauze.
Antihistamines treat allergic reactions to plants or insect bites. A thermometer helps assess fever in wilderness settings.
How can I keep my first aid kit lightweight for ultralight backpacking?
Remove items from original packaging and repackage medicines in smaller containers with clear labels. Use multi-purpose items like duct tape that serves both repair and medical functions.
Choose lightweight alternatives such as fabric plasters instead of plastic ones. Reduce quantities to essential amounts rather than full packets.
Consider sharing certain items with hiking partners to distribute weight. Pack only medications specific to known medical conditions.
Replace heavy items with lighter versions, such as using a whistle instead of heavy signalling devices. Vacuum-seal soft items to reduce bulk.
Can you recommend critical wilderness first aid tips for hikers?
Stop bleeding by applying direct pressure with clean cloth or gauze. Elevate the injured area above heart level when possible.
Treat hypothermia by removing wet clothing and providing dry insulation. Move the person to shelter and provide warm, sweet drinks if conscious.
For sprains, follow the RICE protocol: Rest, Ice, Compression, and Elevation. Immobilise the joint with available materials.
Recognise signs of heat exhaustion including heavy sweating, weakness, and nausea. Move to shade and provide cool water.
Clean wounds thoroughly with clean water before applying antiseptic. Cover with sterile dressing to prevent infection.
What are the 10 essentials one should carry for safety while hiking?
The 10 essentials include navigation tools such as map and compass or GPS device. Sun protection covers sunglasses, sunscreen, and protective clothing.
Insulation means extra clothing layers for temperature changes. Illumination requires headlamp or torch with spare batteries.
First aid supplies address medical emergencies. Fire starting materials include waterproof matches or lighter.
Repair kit contains duct tape, cable ties, and basic tools. Nutrition involves extra food beyond planned meals.
Hydration requires extra water and purification methods. Emergency shelter includes space blanket or bivy sack.
Where can one find wilderness first aid classes?
Mountain rescue teams offer wilderness first aid courses throughout the UK. St John Ambulance provides outdoor-specific first aid training programmes.
The British Red Cross runs wilderness first aid workshops in various locations. Outdoor education centres like Plas y Brenin offer comprehensive courses.
Private training companies such as Wilderness Medical Associates deliver certified programmes. Local hiking clubs often organise group training sessions.
University outdoor societies frequently arrange first aid courses for members. Check with outdoor gear shops as they sometimes host training events.
What basics of wilderness first aid should every hiker learn?
Learn to assess the scene for ongoing dangers before approaching an injured person. Check for responsiveness and breathing using the primary survey method.
Understand how to control bleeding using direct pressure and elevation techniques. Know when and how to apply tourniquets for severe bleeding.
Recognise symptoms of shock including pale skin, rapid pulse, and confusion. Treat by elevating legs and maintaining body temperature.
Master basic wound cleaning and dressing techniques to prevent infection. Understand splinting methods for suspected fractures.
Learn to identify and treat common hiking injuries such as blisters, sprains, and cuts. Understand when evacuation becomes necessary.